Faxing (optional)
This guide gives you information about using your machine as a fax machine.
![[Note]](../common/note.png)
|
|
|
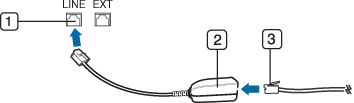
Before you send or receive a fax, you need to connect the supplied phone line cord to the wall jack. Refer to the optional fax kit Installation Guide for how to make a connection. The method of making a telephone connection varies from one country to another.
Sending a fax from your computer
You can send a fax from your computer without going to the machine. Make sure that your machine and the computer are connected to the same network.
Sending a fax (Windows)
To send a fax from your computer, the program must be installed. This program is installed when you install the printer driver.
-
Open the document to be sent.
-
Select from the menu.
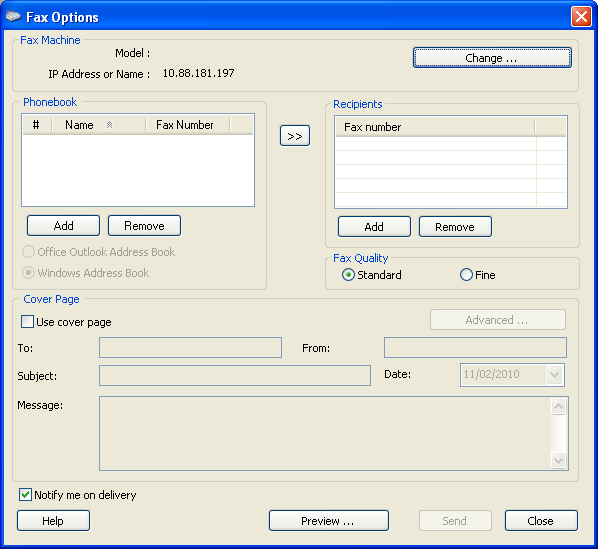
The window will be displayed. It may look slightly different depending on your application.
-
Select from the window
-
Click or .
-
Enter the recipient’s fax number and set the options if necessary.
For more information about , click .
-
Click .
Checking the sent fax list (Windows)
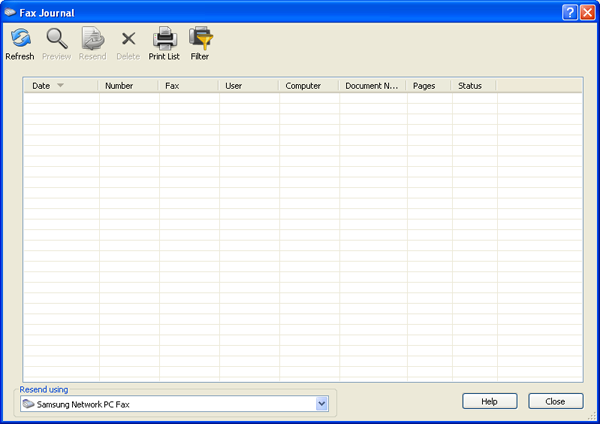
You can check the sent fax list from your computer.
From the menu, click or > > > . Then, the appears with the list of faxes sent.
|
|
|
|
For more information about , click . |
Sending a fax (MAC)
To send a fax from your computer, the program must be installed. This program is installed when you install the printer driver.
The following steps are based on the Mac OS X 10.5 or 10.6. Depending on the OS version, the following steps will be different.
-
Open the document to be sent.
-
Select from the menu.
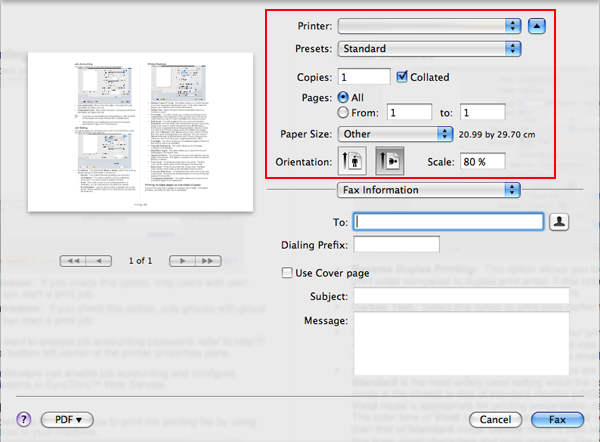
The window will be displayed. It may look slightly different depending on your application.
-
Select from the drop-down list in .
-
Choose the number of copies and pages.
-
Choose your paper size, orientation, and scale.
-
Enter the recipients’ fax number into ’s input area. You can also use pressing
 button, if
you have stored frequently used fax numbers.
button, if
you have stored frequently used fax numbers.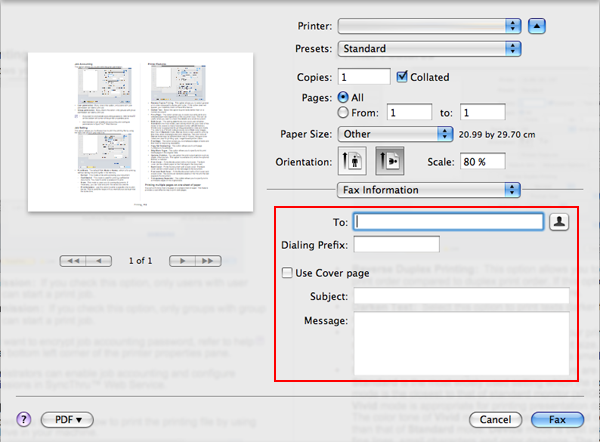
-
If necessary, enter the access code in the input area.
-
If necessary, you can send the fax with a cover page: check .
Enter the subject and message of the fax job.
You can set more detailed options for cover page options in . Select from the drop-down list under .
-
Click .
-
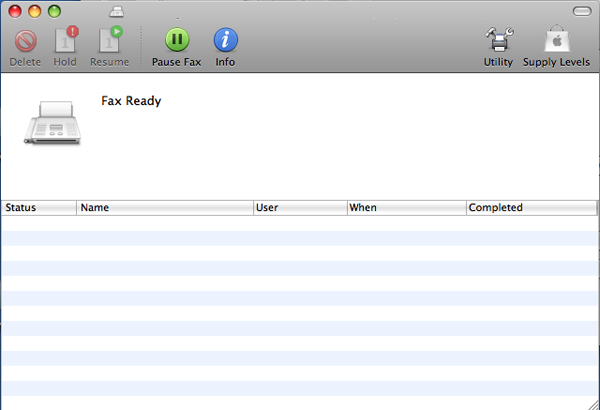
The Fax icon (
 ) appears
on your MAC dock. Click the icon.
) appears
on your MAC dock. Click the icon.You can see the status of the fax job. You can also delete, hold, resume, and pause the fax job.
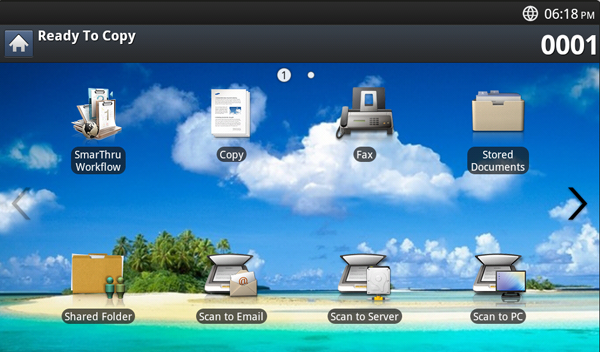
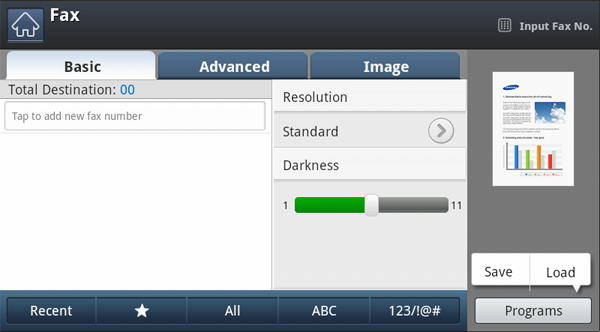
To use the fax feature, press on the display screen.
|
|
|
|
If you want to use this feature, you need to install the optional fax kit on your machine. |
If a different screen is displayed, press ( ) to
go to the home display screen.
) to
go to the home display screen.
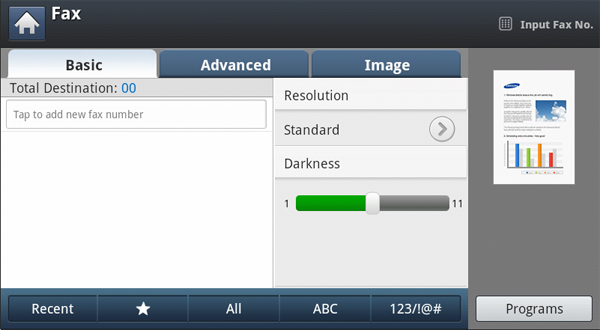
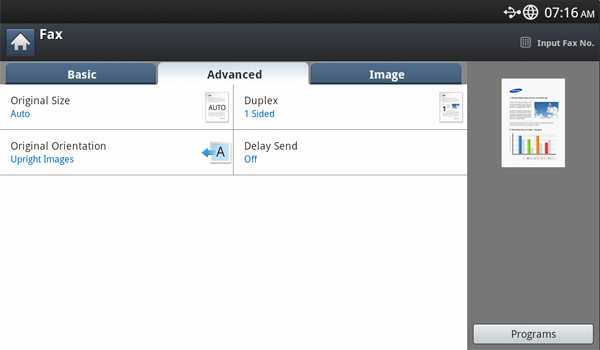
tab
-
Fax number input area: Enter the recipient's fax number using the numeric keypad on the control panel. If you configured the address book, press (see Setting up an address book using the control panel or Setting up an address book using SyncThru™ Web Service).
-
: Enters the recipient's fax number just by pressing stored numbers. You can save frequently used fax numbers using the control panel or SyncThru™ Web Service (see Setting up an address book using the control panel or Setting up an address book using SyncThru™ Web Service).
-
: Allows you to save the current settings for future use (see Using a programs setting).
tab
-
: Selects the size of the original (see Selecting the size of originals).
-
: Selects whether the machine sends faxes one side of the original or both sides of the original (see Faxing on both sides of originals).
-
: Selects the orientation of the originals (see Selecting the orientation of originals).
-
: Sets the machine to send a fax at a later time without your intervention (see Delaying a fax transmission).
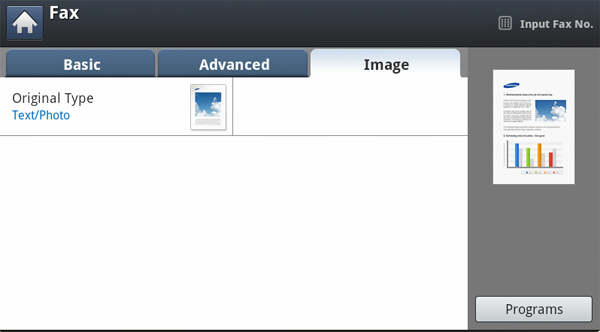
tab
-
: Enhances the fax quality based on the type of the original document being scanned (see Selecting the type of originals).
This part explains how to send a fax and the special methods of transmission.
|
|
|
|
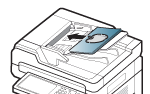
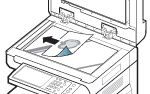
When you place the originals, you can use either the DADF or the scanner glass. If the originals are placed on both the DADF and the scanner glass, the machine will read the originals on the DADF first, because it has higher priority in scanning. |
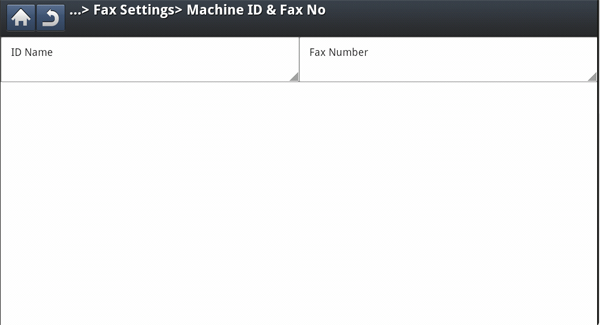
In some countries, you are required by law to indicate your fax number on any fax you send.
-
Press > > > from the display screen.
-
Press a fax line if your machine has multiple fax lines.
-
Press the input area. The pop-up keyboard appears.
Enter your name or the company name. Press .
-
Press the input area.
Enter your fax number using the numeric keypad on the control panel.
-
Press to save the information.
Sending a fax
-
Place the originals face up in the DADF or place a single original face down on the scanner glass and close the DADF (see Loading originals).
This machine automatically reduces the original document to fit the paper size of the recipient’s fax. For example, the origianl document size is A3-sized paper and the paper loaded on recipient’s fax is A4-sized paper, the original paper get reduced to be fit to A4-sized paper.
-
Press from the display screen.
-
Adjust the document settings in the or tab (see Adjusting the document settings).
-
Press the tab.
-
When the cursor is blinking in the input line, enter the fax number using the numeric keypad on the control panel, or use from the display screen, if you have stored frequently used fax numbers.
-
You can send a fax to up to 10 destinations at once.
-
To insert a pause, press at the appropriate place while entering the fax number. “-” appears on the display at the corresponding location.
-
-
Press on the control panel. The machine starts to scan and send a fax to the destinations.
|
|
|
|
Sending a fax using speed dial numbers
When you are prompted to enter a destination number while sending a fax, enter the speed dial number you set previously (see Setting up an address book).
-
Place the originals face up in the DADF or place a single original face down on the scanner glass and close the DADF (see Loading originals).
-
Press from the display screen.
-
Adjust the document settings in the or tab (see Adjusting the document settings).
-
Press the tab.
-
When the cursor is blinking in the input line:
-
For a one-digit (0-9) speed dial number, press and hold the corresponding digit button using the numeric keypad on the control panel.
-
For a two- or three-digit speed dial number, press the first digit button(s) and then hold down the last digit button using the numeric keypad on the control panel.
-
-
Press on the control panel.
The machine starts to scan and send a fax to the destination.
Sending a fax manually using
This method is sending a fax using in the tab.
|
|
|
|
When you use , and in the tab, you cannot send a fax using . |
-
Place the originals face up in the DADF or place a single original face down on the scanner glass and close the DADF (see Loading originals).
-
Press from the display screen.
-
Adjust the document settings in the or tab (see Adjusting the document settings).
-
Press the tab.
-
Press on the display screen.
-
When you hear the dial tone, enter a fax number using the numeric keypad on the control panel.
-
Press when you hear a high-pitched fax signal from the remote fax machine.
Sending a fax manually using an extension telephone
This method is sending a fax using an extension telephone. Make sure that the extension telephone is connected to the socket of the fax kit on the machine.
|
|
|
|
While you are talking over the telephone connected to the socket, copy and scan features are not available. |
-
Place the originals face up in the DADF or place a single original face down on the scanner glass and close the DADF (see Loading originals).
-
Press from the display screen.
-
Adjust the document settings in the or tab (see Adjusting the document settings).
-
Press the tab.
-
Pick up the receiver of the extension telephone.
-
When you hear the dial tone, dial a fax number using the extension telephone.
-
Press on the control panel when you hear a high-pitched fax signal from the extension telephone.
Resending Automatically
When the line you have dialed is busy or there is no answer when you send a fax, the machine automatically redials the number.
To change the time interval between redials and/or the number of redial attempts, follow the steps below:
-
Press > > > from the display screen.
-
Press a fax line if your machine has multiple fax lines.
-
Set the option using the up/down arrows.
-
Set the option using the up/down arrows.
Recent: Shows the last 10 fax numbers dialed. Also, you can choose fax numbers instead of pressing the number key.
-
Place the originals face up in the DADF or place a single original face down on the scanner glass and close the DADF (see Loading originals).
-
Press from the display screen.
-
Adjust the document settings in the or tab (see Adjusting the document settings).
-
Press the tab.
-
Press .
-
Press the fax number you want to redial. Then press .
-
Add to Address: Allows you to add a fax number in the results to .
-
Delete: Allows you to delete a fax number in the results. Press the fax number you want to delete. Then press .
-
-
Press on the control panel. The machine starts to scan and send a fax to destinations.
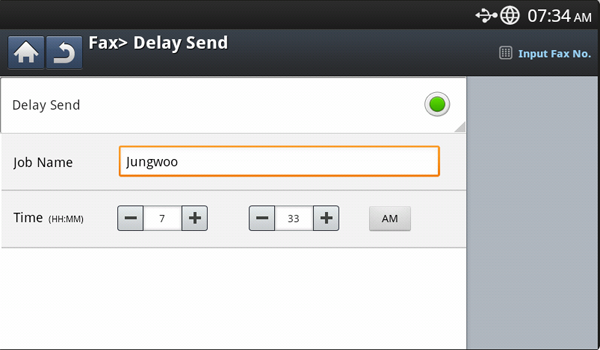
You can set your machine to send a fax at a later time when you will not be present.
|
|
|
|
-
Place the originals face up in the DADF or place a single original face down on the scanner glass and close the DADF (see Loading originals).
-
Press from the display screen.
-
Adjust the document settings in the or tab (see Adjusting the document settings).
-
Press the tab.
-
When the cursor is blinking in the input line, enter the fax number using the numeric keypad on the control panel. Or use from the display screen, if you have stored frequently used fax numbers.
-
Press the tab > .
-
Press the input area. Then the pop-up keyboard appears.
Enter the job name you want. Press .
If you do not enter a job name, the machine assigns the job name as ''.
-
Set the delay sending time.
You can set the delay sending time to be greater than 15 minutes later than the current time. For example, if it is 1:00, then you can set the time starting to be 1:15. If the set time is incorrect, a warning message will appear when the machine resets it to the current time.
-
Press on the control panel. The machine starts to store the scanned original data into memory.
|
|
|
|
To cancel delaying a fax, press before sending is activated. |
This part explains how to receive a fax and the special receiving methods available.
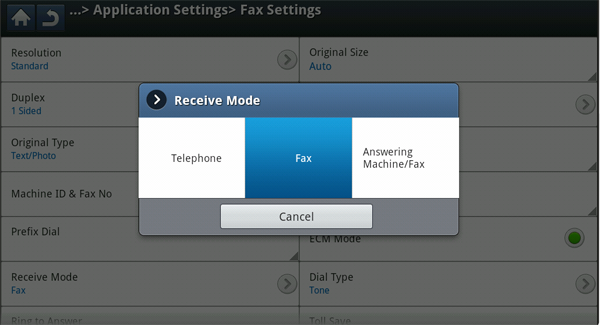
Your machine is preset to the mode at the factory. When you receive a fax, the machine answers the call on a specified number of rings and automatically receives the fax. However, if you want to change the receive mode to another mode, follow the steps below:
-
Press > > > from the display screen.
-
Press a fax line if your machine has multiple fax lines.
-
Press .
-
Press the appropriate option.
-
: Receives a fax by pressing and then .
-
: Answers an incoming fax call and immediately goes into the fax reception mode.
-
: Is for when an answering machine is attached to your machine. Your machine answers an incoming call, and the caller can leave a message on the answering machine. If the fax machine senses a fax tone on the line, the machine automatically switches to Fax mode to receive the fax.
-
-
Press to save the information.
You can receive a fax call by pressing and then pressing when you hear a fax tone from the remote machine. The machine begins receiving a fax.
This feature works best when you are using an extension telephone connected to the EXT socket on the back of your machine.
When you receive a call on the extension phone and hear fax tones, press the key *9* on the extension phone. The machine receives the fax.
Press the buttons slowly in sequence. If you still hear the fax tone from the remote machine, try pressing *9* once again.
To change the *9* to, for example, *3*, follow the steps below:
-
Press > > > from the display screen.
-
Press to activate this feature.
-
Enter the number 3 using the numeric keypad on the control panel
-
Press .
You may need to prevent your received faxes from being accessed by unauthorized people. You can turn on secure receiving mode to restrict printing of received faxes when the machine is unattended. In secure receiving mode, all incoming faxes go into memory.
-
Press > > > from the display screen.
The mode can only be configured by an authorized user who has registered an ID and a password on the machine. When the machine requests, enter the ID and password.
-
Press a fax line if your machine has multiple fax lines.
-
Press to active this feature.
When the machine receives a fax in this mode, will be activated. If you want to print the secured faxes, press . All secured faxes will be printed out.
-
If you want incoming faxes to go into memory always, press . Otherwise, go to the next step.
-
Set by pressing the + and - buttons. Press .

-
Press , and set the specific end time using the up/down or left/right arrows. Then press .
-
Press from the display screen.
|
|
|
|
To deactivate the feature, press . In this case, the received fax will be printed out. |
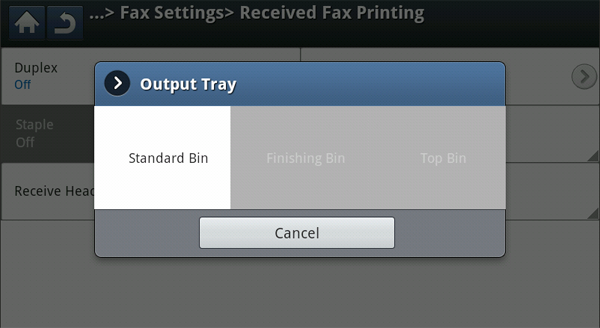
This option allows you to specify the tray where the fax will be printed.
-
Press > > > > from the display screen.
-
Press the appropriate tray.
-
In CLX-9301 Series, the is optional device.
-
The and are available only when the optional Inner Finisher or booklet finisher is installed.
-
When the optional Inner Finisher or booklet finisher is installed, is inactivated.
-
-
Press .
Set this duplex feature to save paper. When the machine prints the received fax data, it prints them on both sides of the paper.
-
Press > > > > from the display screen.
-
Press the appropriate option.
-
: Prints on only one side of the paper.
-
: Prints on both sides of the paper; however, the binding will be the long edge.
-
: Prints on both sides of the paper; however, the binding will be the short edge.
-
-
Press .
Printing received faxes to the right tray (face up)
This machine allows you to receive incoming faxes through the right tray (face up). When you use the right tray, the received faxes pile up in sequence beginning with the first page at the bottom.
-
Press > > > > > from the display screen.
-
Press .
Since your machine is a multi-tasking device, it can receive faxes while you are making copies or printing. If you receive a fax while you are copying or printing, your machine stores incoming faxes in its memory. Then, as soon as you finish copying or printing, the machine automatically prints the fax.
Adjusting the document settings
Before sending a fax, you can adjust the document settings, such as resolution, darkness, color, duplex and so on.
|
|
|
|
The document setting herein is for the current job only. If you want to change the default settings on document settings, refer to > > > . |
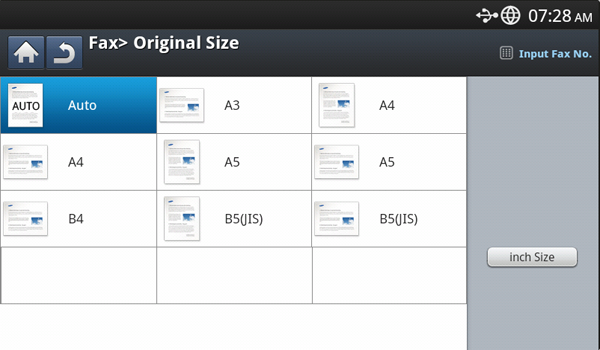
A fax can be sent after specifying the original document size if the original document size cannot be detected automatically or if you wish to specify a certain document size.
-
Press the tab > from the display screen..
-
Press the appropriate option.
You can change the paper list on the display screen pressing or . The paper list is divided into the available A/B size type and letter size type paper in this machine.
-
: Automatically detects the size of originals, but this option supports only when originals are Letter-, Ledger-, Legal-, Statement-, A3-, A4-, A5-, B4-, or JIS B5-sized.
-
Other preset values: Allows you to easily select values commonly used.
-
-
Press from the display screen.
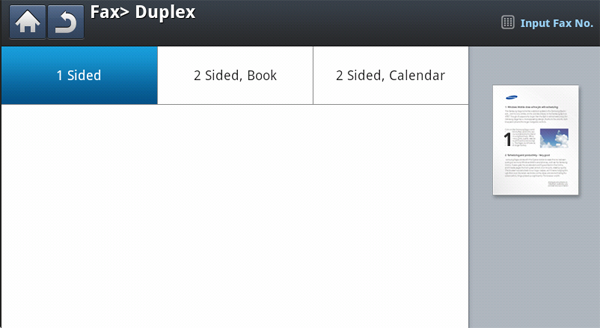
This function is especially intended for two-sided originals. You can select whether the machine sends the fax on one side or both sides of the paper.
-
Press the tab > , then set the original orientation.
-
Press the appropriate option.
-
: For originals that are printed on one side only.
-
: For originals that are printed on both sides.
-
: For originals that are printed on both sides, but the back is rotated 180 degrees.
To use and , load the originals on the DADF. If the machine cannot detect the original on the DADF, it automatically changes the option to .
-
-
Press from the display screen.
When faxing double-sided documents, specify the document orientation. Otherwise, the faxes may not be printed in the correct page order or correct front and back page arrangement.
-
Press the tab > , then set the original orientation.
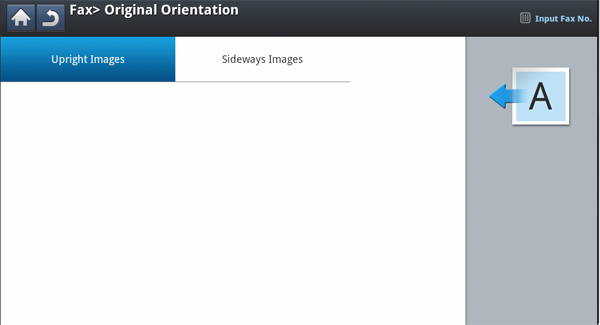
-
Press the appropriate option.
-
: Select this setting for an original document loaded with the top toward the back of the machine.
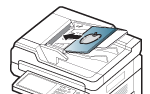
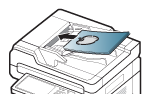
Using the DADF
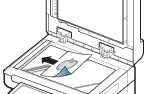
Using the scanner glass
Icon


-
: Select this setting for an original document loaded into the DADF with the top of the original document toward the left side of the machine, or an original document placed on the scan glass with the top of the original document toward the right side of the machine.
Using the DADF
Using the scanner glass
Icon


-
-
Press from the display screen.
The default document settings produce good results when using typical text-based originals. However, if you send originals that are of poor quality, or contain photographs, you can adjust the resolution to produce a higher quality fax.
Press left/right arrow to toggle the values.
-
: Usually recommended for originals with text. This option will reduce the transmission time.
-
: Recommended for the originals containing small characters, thin lines, or text that was printed using a dot-matrix machine.
-
: Recommended for originals containing fine detail. This option is enabled only if the receiving machine also supports resolution.
-
: Recommended for originals containing extremely fine detail. This option is enabled only if the receiving machine also supports resolution.
|
|
|
|
When your machine is set to the or resolution and the fax machine with which you are communicating does not support the or resolution, the machine transmits using the highest resolution mode supported by the other fax machine. |
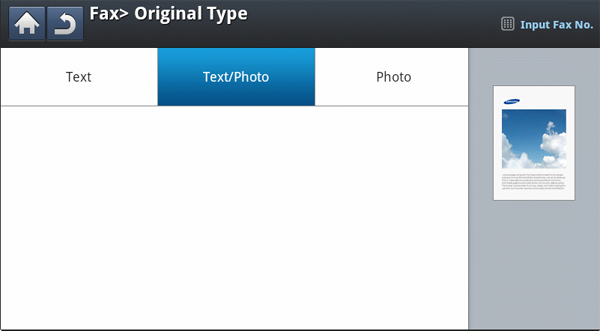
You can set the original document type to enhance the quality of a document being scanned.
-
Press the tab > from the display screen.
-
Press the appropriate option.
-
: For originals with text or line art.
-
: For originals with both text and photographs together.
-
: For originals that are a continuous tone photograph.
-

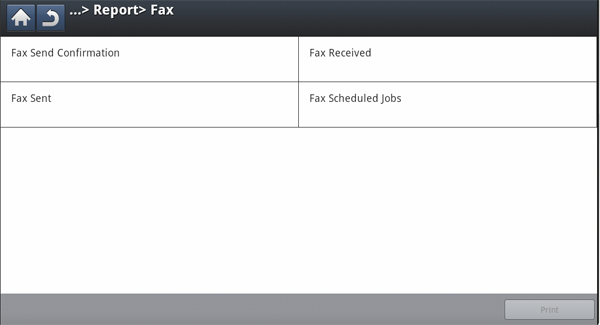
You can set the machine to print a report whether a fax transmission and reception is successfully completed or not.
|
|
|
|
If a report contains characters or fonts that the machine do not support, could be printed instead of the characters/fonts in the report. |
-
Press > > > from the display screen.
-
Press the appropriate option.
-
: Prints a confirmation report when you send a fax to multiple locations.
-
: Disables this feature.
-
: Activates this feature.
-
On-Error: Prints a report only when a transmission fails.
-
-
: Prints a confirmation report showing whether a transmission was successful, how many pages were sent, and other information.
-
: Disables this feature.
-
: Activates this feature.
-
On-Error: Prints a report only when a transmission fails.
-
-
: Prints a confirmation report whether a transmission was successful, how many pages were sent, and other information.
-
: Disables this feature.
-
: Activates this feature.
-
-
: Prints a confirmation report whether a reception was successful, how many pages were received, and other information.
-
: Disables this feature.
-
: Activates this feature.
-
-
-
Press from the display screen.
This option allows you to save the current settings for future use. You can also use the previous settings from the previous job.
Saving
-
Press from the display screen.
-
Adjust the document settings in the or tab (see Adjusting the document settings).
-
Press the tab.
-
Press .
-
Press input area. The pop-up keyboard appears.
Enter the program name you want. Then press .
You can see the values of set by scrolling up or down and check the values using the up/down arrows.
-
Press . When the confirmation window appears, the settings you set are saved. Click or .
Using
-
Place the originals face up in the DADF or place a single original face down on the scanner glass and close the DADF (see Loading originals).
-
Press from the display screen.
-
When the cursor is blinking in the input line, enter the fax number using the numeric keypad on the control panel, or use from the display screen, if you have stored frequently used fax numbers.
-
Press > .
-
Press a program name in the list that you want to use.
-
Press .
-
Press when the confirmation window appears.
The machine is now set to fax according to the selected setting.
-
Press on the control panel. The machine starts scanning and sending a fax to destinations.
|
|
|
|
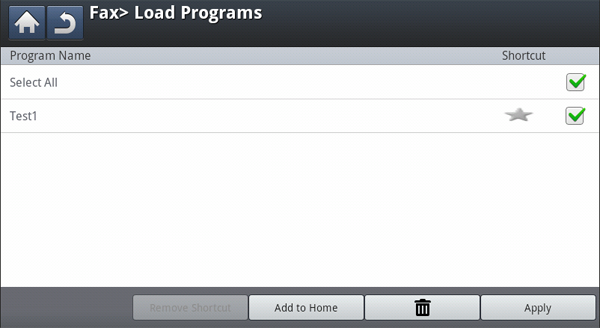
Managing
-
Press from the display screen.
-
Press > .
-
Press the appropriate option.
-
: Selects all programs.
-
: Displays detailed information of selected program.
-
: Changes a name of selected program.
-
: Removes the selected programs.
-
-
Press for return to the tab.
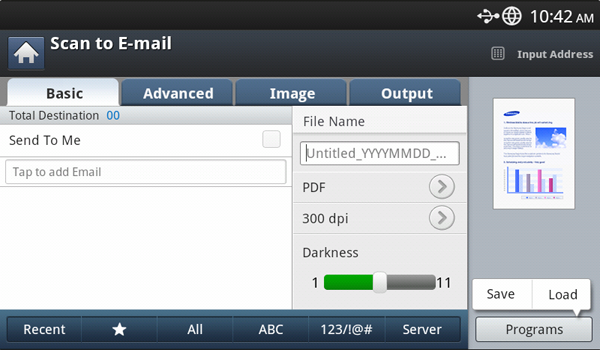
This option allows you to save the current settings for future use. You can also use the previous settings from the last job.
Saving
-
Press , , or from the display screen.
-
Set scan features in the , , or tabs (Changing the scan feature settings).
-
Press the tab.
-
Set the scan quality by and .
-
Press > Save.
-
Press input area. The pop-up keyboard appears.
Enter the program name you want. Then press .
You can see the values of set by scrolling up or down and check the values using the up/down arrows.
-
Press .
-
You can check the all settings again. If everything is fine, press to make shortcut in main screen, to save current settings or to quit without saving.
Loading
-
Press , or from the display screen.
-
Press > Load.
-
Press the previous setting you want to use.
The machine is now set to scan according to the setting you selected.
-
Press to make a shortcut in main screen, to delete the current setting or to use the selected setting.