|
|
|
|
Depending on the authentication settings you selected, you may need to log-in as an administrator to access some options under menu (see Security).
-
Press from the display screen.
-
Select the option you want. If the option is available for only the administrator, the following screen appears.
Enter the , , and using the pop-up keyboard which appears when you press each field.
![[Note]](../../common/icon_note.png)
-
Enter the ID and password you first set when you turned on the machine: (see Initial Settings).
-
The default is .
-
You can also use the button to find the recently used ID and button to find the domain from the list stored in the machine.
-
When you log-in, you can see the ID of the logged in user on the display.
-
-
Press .
You can check the detailed machine information. Check the status of installed hardware and software versions to help you maintain the machine. You can download the latest software from the Samsung website.
-
Press > from the display screen.
-
Press the option you want.
-
: Shows the status of installed hardware including optional parts.
-
: Shows the software versions of the systems installed.
-
: Shows the capabilities of the hardware.
-
QR Code: You can scan the QR code on the screen with your smartphone or tablet to see information about the printer. You can also use the QR code to register the printer in Samsung Cloud Print.
-
-
Press
 () for return to the
previous screen.
() for return to the
previous screen.
|
|
|
|
Some menus may differ from your machine depending on its options or models. |
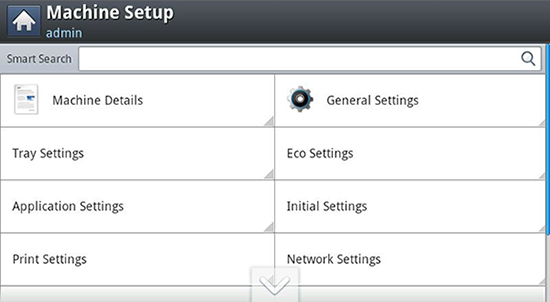
Before using the machine, set up the general settings, as follows:
Press > from the display screen.
|
Feature |
Description |
|||
|---|---|---|---|---|
|
Allows you to set the date and time. The date and time you set in this option will be used for sending/printing delayed fax/print jobs or will be printed on reports. |
||||
|
|
Allows you to reduce energy consumption. If you set this option, the machine goes into power saving mode when not in use.
|
|||
|
|
When there is no input for a certain period of time, the machine cancels the held job or exits the current menu and goes in to the default settings. You can set the amount of time the machine will wait before it cancels a held job or exits the current menu.
|
|||
|
|
Allows you to choose the altitude your machine is placed in. Print quality is affected by atmospheric pressure. The atmospheric pressure is determined by the height of the machine above sea level.
|
|||
|
|
Allows you to choose the default paper size. |
|||
|
|
Allows you to select the PDF format. If you select , you can create a PDF file that can be displayed exactly the same way regardless of where the file is opened. and you can use Compact function.
|
|||
|
|
Allows you to set options for supplies reorder notification. If you set this option, the machine will display a warning message when the supplies are running out. Prepare the supplies in advance.
|
|||
|
|
Allows you to set the volume for button sound, notice alarm, and sounds occurring during fax job. You can test the volume right after you set the level. Using the Quiet/Loud buttons select the desired volume and press the button to test the volume.
|
|||
|
|
Allows you to choose the measuring unit (mm or inch) and set the numeric separation (comma or period) for thousands separator. |
|||
|
|
|
|||
|
|
Allows you to choose the menu order of the Home window.
|
|||
|
|
Allows you to apply the stamp feature, prints the time and date, IP address, or user ID, on the copy output. |
|||
|
|
Allows you to show job progress in display. |
|||
|
|
allows the machine to proceed to the next job when the current job pauses due to a paper mismatch or paper empty error. |
|||
|
|
Allows you to manage the color settings including copy darkness, and print density. |
|||
|
Determines what the machine does when the staple cartridge is empty.
|
||||
|
|
Determines what the machine does when it fails to automatically detect the size of the original.
|
|||
|
|
Uses simplex mode when printing only one original page or a blank page although the duplex option is enabled. |
|||
|
[a] May only be available for the administrator depending on the authentication settings selected (see Security). [b] X322x /K328x series only. This option appears only when the finisher option is installed. |
||||

Other settings
|
|
|
|
Some menus may differ from your machine depending on its options or models. |
Press from the display screen.
OR
Press > from the display screen.
|
Option |
Description |
|||
|---|---|---|---|---|
|
|
Allows you to set the default settings for some features (see Application settings). |
|||
|
|
Allows you to check the current tray settings and change the settings if necessary (see Tray settings). |
|||
|
Allows you to set the Eco mode as a default and change settings for Eco mode. Using Eco mode can save printing resources (see Eco Settings). |
||||
|
Allows you to set the basic settings needed to be set before using the machine (see Initial Settings). |
||||
|
|
Allows you to set the default print settings (see Print Settings). |
|||
|
Allows you to set the network related settings (see Network Settings). |
||||
|
|
Allows you to select the language that appears on the display screen. |
|||
|
Allows you to set up the security related settings (see Security). |
||||
|
|
Allows you to set up the supplies life.
|
|||
|
|
Shows the list of reports you can print.
|
|||
|
|
Allows you to set the default settings for some features.
|
|||
|
Allows you to manage application and licenses
|
||||
You can set the default copy options. Set the most frequently used copy settings.
|
|
|
|
You can also use this feature from the SyncThru™ Web Service. Open the Web browser from your networked computer and type the IP address of your machine. When SyncThru™ Web Service opens, click > > . |
-
Press > > from the display screen.
-
Select the appropriate option.
Option
Description
You can select the default tray to use when copying.
You can reduce or enlarge the original to fit the paper to which you are copying. For example, if the original is A3 and you want it to be copied on A4 sized paper, press . If you want to set customized size, select the and select the reduce/enlarge percentage of the original with , button.
You can select the duplex and binding options.
The color modes allow you to print the output in color or black and white. You can select the following color modes.
-
[a]: Select this setting to automatically detect whether the scanned document is in color or black and white, and then select an appropriate color setting.
-
[a]: Select this setting to print the same as the original image color. Depending on the circumstances and quality of originals, the printout’s quality could be different from the sample image’s.
-
: Select this setting to print the copy in black and white, regardless whether the scanned document is in color or in black and white.
You can select the options for how you want the outputs to be arranged.
-
This feature is available only when the optional finisher is installed.
-
Some features are available only when the optional finisher is installed.
-
: Select how to sort the output.
-
: The outputs are in sets to match the sequence of originals.
-
: The outputs are sorted into stacks of individual pages.
-
-
: When printing multiple copies, this option shifts the output position of each set.
-
: Stacks the printouts in criss-crossed sets.
-
: This option allows you to specify the tray where to output the printed documents.
-
: Specify the number of staples to use when binding the document (either 1 or 2 staples).
-
: Specify the number of holes to punch in the document (either two or three holes). Some punch kits may offer a 4 Hole option instead of the 3 Hole option.
You can select the darkness of the copy.
You can select the default original’s size.
You can Select the orientation of the originals.
-
: Select this setting for an original document loaded with the top toward the back of the machine.
-
: Select this setting for an original document loaded into the RADF with the top of the original document toward the left side of the machine or an original document placed on the scanner glass with the top of the original document toward the right side of the machine.
You can select the type of original you are copying. This will give you a better copy result.
After the scanning is finished, the window appears to ask if you want to scan another page.
You can select the ID copy method.
Allows you to customize the manual ID copy template. (see Setting up Manual ID copy).
-
: Creates a new ID copy template.
-
: Edits an existing ID copy template.
-
: Deletes an existing ID copy template.
[a] X322x/ X328x series only.
-
-
Press
() to save the change
and return to the previous screen.
You can set the default fax options. Set the most frequently used fax settings.
|
|
|
|
You can also use this feature from the SyncThru™ Web Service. Open the Web browser from your networked computer and type the IP address of your machine. When SyncThru™ Web Service opens, click tab > > . |
-
Press > > from the display screen.
-
Select the appropriate option.
The fax options are different from country to country depending on the International Communications Regulatory. If some of the fax options explained in the instructions have been grayed-out, it means that the grayed-out option is not supported in your communication environment.
Option
Description
You can select the scanning resolution value.
You can set the default original’s size to use.
You can select the duplex options.
-
: For originals that are printed on one side only.
-
: For originals that are printed on both sides.
-
: For originals that are printed on both sides, but the back is rotated 180 degrees.
You can select the orientation of the originals.
-
: Select this setting for an original document loaded with the top toward the back of the machine.
-
: Select this setting for an original document loaded into the RADF with the top of the original document toward the left side of the machine or an original document placed on the scanner glass with the top of the original document toward the right side of the machine.
You can select the type of original you are copying. This will give you a better copy result.
You can select the darkness of the copy.
You can set the machine ID and fax number which will be printed at the top of each page.
You can set the machine to re-dial the fax number if the recipient’s fax machine is busy or not answering. You can set the number of re-dial attempts and the interval between attempts.
-
: Select the terms for re-dialing using the +/- button.
-
: Select the re-dial time using the +/- button. Selecting 0 for means that the machine will not re-dial.
You can set the number to be dialed before a number is dialed. Users may set this to access a PABX (e.g., 9) or area code (e.g., 02). Once this number is set, it will automatically appear on the screen when entering a phone/fax number.
You can set the machine to correct the error. It helps with poor line quality and ensures any faxes you send are properly transmitted to any other error correction mode-equipped fax machines. Sending a fax using error correction mode may take more time.
You can set and options.
-
: Select to change the fax receiving mode.
-
: Receives a fax by pressing > and then
 ().
(). -
: Answers an incoming fax call and immediately goes into the fax reception mode.
-
: Is for when an answering machine is attached to your machine. Your machine answers an incoming call, and the caller can leave a message on the answering machine. If the fax machine senses a fax tone on the line, the machine automatically switches to mode to receive the fax.
-
This feature works best when you are using an extension telephone connected to the EXT socket on the back of your machine. You can receive a fax from someone you are talking to on the extension telephone, without going to the fax machine. When you receive a call on the extension phone and hear fax tones, press the keys *9* on the extension phone. The machine receives the fax. Press the buttons slowly in sequence. If you still hear the fax tone from the remote machine, try pressing *9* once again. *9* is the remote receive code preset at the factory. The first and the last asterisks are fixed, but you can change the middle number to whatever you wish.
Set the dialing mode to either tone or pulse. This setting may not be available depending on your country.
You can set the number of times the machine rings before answering an incoming call.
You can set the machine to send a fax in the toll save time for saving money.
Enable a user to answer several different phone numbers on the same telephone line. Set the machine to recognize different ring patterns for each number. This setting may not be available in your country.
Use this feature to reject faxes sent from numbers stored in memory as junk fax numbers. This feature is useful to block any unwanted faxes. When you turn this feature on, you can access additional options to set junk fax numbers. This option may not be available in your country.
You can set the machine to keep the received faxes in memory so that unauthorized people cannot access them when you are absent. This option restricts printing of received faxes when the machine is unattended.
-
: Select to not use secure receive.
-
: Select to use secure receive.
-
: Select to print faxes in the memory. You need to log-in as an administrator to print out received faxes in memory.
You can set options for printing received faxes.
You can select the options for the Fax send confirmation, Fax sent/ Fax Received report.
You can select the country as a default. Before you change it, you need to connect telephone line with the machine. When you change the country, ping test will be followed.
The Smart Fax feature optimizes the settings for your fax line.
-
-
Press
() to save the change
and return to the previous screen.
You can set the options for scanning to email. The options you set here will be applied when sending the scanned data to e-mail.
|
|
|
|
You can also use this feature from the SyncThru™ Web Service. Open the Web browser from your networked computer and type the IP address of your machine. When SyncThru™ Web Service opens, click tab > > . |
-
Press > > from the display screen.
OR
Press > > from the display screen.
OR
Press > > from the display screen.
OR
Press > > from the display screen.
OR
Press > > from the display screen. This menu appears when the mass storage device (hard disk) option is installed.
-
Set the appropriate options.
Option
Description
You can select the scanning resolution value.
You can select the degree of darkness of scan outputs.
You can select the duplex options.
-
: Select the binding of the original.
-
: Select the binding of the original.
-
: Select the binding of the original.
You can set the default original’s size to use.
You can Select the orientation of the originals.
-
: Select this setting for an original document loaded with the top toward the back of the machine.
-
: Select this setting for an original document loaded into the RADF with the top of the original document toward the left side of the machine or an original document placed on the scanner glass with the top of the original document toward the right side of the machine.
You can select the type of the original you are scanning. This will enhance the scan quality based on the type of the original document being scanned.
You can select the color options of the scan outputs.
You can select the quality of the scan outputs.
-
: Produces a high quality image, and the file size will be large.
-
: Both the image quality and file size will be between and .
-
: Produces a low quality image, and the file size will be small.
You can select the file format of the scan outputs.
-
: Scans originals in JPEG format.
-
: Scans originals in PDF format.
-
: Scans originals in TIFF (Tagged Image File Format).
-
[b]: Scans originals in XPS format. Scans originals in TIFF (Tagged Image File Format).
If you want several originals to be scanned as one file, press in the option. This is not available for format.
You can select an option for Print confirmation report
-
: Prints the report always.
-
: Does not print report.
-
: Print the report only on errors.
You can choose the policy for generating file names before you proceed with the scan job.
-
: The sent file is saved as a different file name that is automatically programmed.
-
: Does not save the sent file.
-
: The sent file overwrite the existing file.
[a] menu does not support this option.
[b] This option appears only when the mass storage device (hard disk) option is installed.
[c] and only.
[d] and only.
-
-
Press
() to save the change
and return to the previous screen.
This feature allows you to store frequently used phone numbers, fax numbers, and e-mail addresses on the machine’s hard drive. When sending a fax, you can use the address book created here. It will save time entering fax numbers and e-mail addresses.
|
|
|
|
You can also use this feature from the SyncThru™ Web Service. Open the Web browser from your networked computer and type the IP address of your machine. When SyncThru™ Web Service opens, click . |
-
Press > > from the display screen.
-
Select the appropriate option.
Option
Description
Press this button and select your search. The categories are: , , , and .

Enter the keyword (eg., the first letter of the name for which you are searching) in the blank field and press this button. The machine starts to search for the address.
Press checkbox to select all the addresses in the list.
Press this button to create a new address.
Select the address you want to edit and press this button.
Select the address you want to delete and press this button.
-
Press
() to the previous screen.
This feature allows you to check the current tray settings and change the settings if necessary. There are many options available for setting the tray and paper. Make the best use of the options to fit your needs for trays and paper.
|
|
|
|
You can also use this feature from the SyncThru™ Web Service. Open the Web browser from your networked computer and type the IP address of your machine. When SyncThru™ Web Service opens, click tab > > >. |
-
Press > from the display screen.
-
Check the current tray settings. If you do not need to change the setting, go to step 5.
-
Press to change the current settings.
-
Press the option you want to change.
If some options are grayed out, it means that the grayed-out option is not supported for your machine or optional parts needed to use the option are not installed.
Option
Description
[x][a]/
You can set the paper size and type to use in the each tray. Also, you can activate a tray confirmation message which asks whether or not to set the paper size and type for the just opened tray.
You can set the machine to automatically switch to the tray with the same sized paper when the tray in use is empty.
Determine whether or not the machine continues printing when it detects the paper does not match the paper settings.
Automatically substitutes the printer driver’s paper size to prevent the paper mismatch between Letter and A4. For example, if you have A4 paper in the tray but you set the paper size to Letter in the printer driver, the machine prints on A4 paper and vice versa.
You can set the tray to be excluded from the Tray priority setting. Select the tray and press the radio button to activate this option.
You can set the usage priority among trays with the same sized paper. Paper in the tray with the highest priority will be used first. Select the tray and use the / buttons to set the priority.
[a] [tray type] indicates the tray number.
-
Press
() to save changes and
return to the previous screen.
This feature allows you to set the Eco mode as a default and options related to it. Eco mode is created to set the options that reduce toner and paper usage. For example, one of the options for Eco mode is duplex printing. Instead of printing on two different pieces of paper, Eco mode is designed to print on both sides of one piece of paper (duplex). If you try to print on two different pieces of paper when Eco mode is on, a message asking if you want to disable the Eco mode appears. Follow the instructions below to set the Eco mode options.
|
|
|
|
You can also use this feature from the SyncThru™ Web Service. Open the Web browser from your networked computer and type the IP address of your machine. When SyncThru™ Web Service opens, click the tab > > > . |
-
Press > from the display screen.
-
Select the appropriate option.
-
: You can set the Eco mode on as a default. If you set this mode on, users will need to press the Eco button on the control panel to turn it off. However, if you (administrator) set the password, users need to enter the password in order to turn this mode off. Once this feature is on, you can see the
 symbol
next to the options set with eco mode.
symbol
next to the options set with eco mode.-
: Set the Eco mode on.
-
: Set the Eco mode off.
-
: Set the Eco mode on with password. If a user wants to turn the Eco mode off, the user needs to enter the password.
If you set this mode to off, the Eco mode print job from the driver will not be calculated as a Eco mode nor will the Eco mode LED on the control be on.
-
-
: You can set the default options for Eco mode.
-
Factory Default: You can keep the default settings.
-
Custom Settings: You can set printing from copy and PC driver print settings related settings. The settings you set here will be applied to all copy print and PC driver print jobs sent to the machine, unless the user disables Eco mode.
-
-
-
Press to save the change or
() to return to the previous screen.
Initial Settings
You can change the initial settings when you first turn the machine on.
-
Press > from the display screen.
-
Press the language to use on the display screen and then press .
-
Enter the password to use and then press . Re-enter the password to confirm it, then press > .
-
Set the time on the machine. Then press .
-
Remove the existing device name and enter the device name you want to use and then press . Then press . If necessary, enter the location of the machine in the field. If necessary, enter the information in the Administrator field for the person to contact when any problem occurs on the machine.
-
When Connected appears after pressing the button, press .
If appears, make sure that the machine is connected to the network then verify the LAN connection again.
If a network connection problem persists, contact your network administrator.
-
Enter the IP address, subnet mask, and gateway in each field. Then press .
-
If a new IP address is assigned automatically by a DHCP or BOOTP, press or .
-
If you are not sure about your network environment, contact your network administrator.
-
-
Enter the , , and in each field. Then press .
-
The completed window appears. Press the button.
If the engine is busy, the machine might take longer to reboot.
You can set print related settings. When there is no specific input for printing options, the machine prints with the settings you set here. Set the frequently used printing settings. This feature can be useful if your company has a specific printing form.
|
|
|
|
You can also use this feature from the SyncThru™ Web Service. Open the Web browser from your networked computer and type the IP address of your machine. When SyncThru™ Web Service opens, click the tab > > . |
-
Press > from the display screen.
-
Select the appropriate option.
Option
Description
You can set , , .
-
: You can choose the emulation format.
-
: You can select the tray as a paper source.
-
: You can skip the blank pages during printing.
Provides paper layout related options.
-
: Select the paper orientation.
-
: Select the paper orientation for duplex mode.
-
: Select the number of copies you want to print.
-
: Adjust the margin for Common Duplex, Common Simplex, Emulation.
-
-
Press
() to save changes and
return to the previous screen.
This feature allows you to set up the network. Before setting up the information, you must have the relevant information concerning the type of network protocols and computer system you use. If you are not sure which settings to use, contact your network administrator for such information.
-
Press > from the display screen.
-
Set the appropriate options.
Option
Description
You can set the network settings (see Network settings (TCP/IP)).
You can set the UPnP settings.
You can set the ports needed for network printing.
You can set the settings.
You can set SNMP (Simple Network Management Protocol). Administrator’s can use SNMP to monitor and manage machines on the network.
You can set the mDNS settings.
You can set the SNTP settings.
You can set the SetIP settings.
You can set the SLP settings.
You can set the network filtering settings.
You can set the HTTP settings.
You can set the Wi-Fi settings.
After installing the Wireless/NFC kit (Optional), set the machine to use this feature.
You can set the NFC settings.
After installing the Wireless/NFC kit (Optional), set the machine to use this feature.
Reverts the network settings to the default values. (Reboot required.)
-
Press
() to save the change
and return to the previous screen.
This feature allows you to set up the security related settings.
|
|
|
|
You can also use this feature from the SyncThru™ Web Service. Open the Web browser from your networked computer and type the IP address of your machine. When SyncThru™ Web Service opens, click the tab > . |
-
Press > from the display screen.
-
Select the appropriate option.
Option
Description
You can set the machine to overwrite data stored in the memory. The machine overwrites the data with different patterns eliminating the possibilities of recovery.
-
: When a job is completed, there are temporal images left in the memory. For security reasons, you can set the machine to automatically overwrite secure non-volatile memory. If you want to secure memory space, you can set the machine to automatically overwrite secure non-volatile memory.
-
: When printing, copying, scanning, and faxing, the machine temporarily uses memory space. For security reasons, you can set the machine to manually overwrite secure non-volatile memory. If you want to secure memory space, you can manually overwrite secure non-volatile memory. You can set the machine to repeat the manual image overwrite after the system is rebooted
-
Scheduled Image Overwrite: Schedules when to overwrite the images stored on the machine. You can select the frequency (daily, weekly, monthly), time, day of the month (1-31), or day of the week on which to overwrite the images.
-
: You can select the method for overwriting the secure non-volatile memory (hard disk).
-
: Select to overwrite the memory 7 times. When overwriting for the 6 times, alternate 0x00 and 0xff are used to overwrite the disk, and, in the 7th time, the disk is written with 0xAA.
-
: Select to overwrite the memory 3 times. When overwriting three times, patterns 0x35, 0xCA, 0x97 are used to overwrite the disk’s content. This method of overwriting the disk is specified by US DoD.
-
: Select to overwrite the memory 5 times. When overwriting 5 times, character “C” and its complement alternatively are used to overwrite the disk. After the 2nd time, there is a mandatory validation. For the 5th time, random data is used.
-
: Select to overwrite the memory 3 times. When overwriting three times, patterns 0x35, 0xCA, 0x97 are used to overwrite the disk’s content. This method of overwriting the disk is specified by US DoD.
-
: Select to determine the number of times the memory will be overwritten. The hard disk will be overwritten as many times as the number you select.
-
-
-
: Activate device authentication. Device authentication requests a user to login before being able to use the device. Users cannot use any application without logging in.
-
: Activate application authentication. An administrator can choose the application(s) to require user to login to use. Users cannot use the selected application(s) without logging-in. Press to enable authentication.
-
: Activate basic authentication. Users are asked to login when they select options that are only available to administrators.
-
-
-
: Executes authentification process based on the user information stored at mass storage device (hard disk) in the device.
-
: Allows users to login by entering ID and password.
-
: Executes authentication process based on the user information allocated from SyncThru™ Web Service.
-
: Executes authentication process based on the user information stored at kerberos server.
-
: Executes authentication process based on the user information stored at LDAP server.
-
: Executes authentication process based on the user information stored at SMB server.
-
-
: Provides Pre-Installed-For-LUI, by default.
-
: Provides Pre-Installed-For SyncThru™ Web Service, by default.
-
: Select what to require for the user to login
-
: You can use auto logout.
-
: You can set the auto logout time.
-
: You can select the login Identification type.
-
: You can set the Login Restriction time, attemp, or lock-out time.
-
: You can set the logout policy.
-
Select to disable IPSec.
You can enable 802.1x authentication, which is a port-based authentication. If this authentication is enabled, the machine is not allowed to access through the protected side of the network until the machine is authorized. Use this feature to protect your network.
-
: Offers minimal security. The MD5 hash function is vulnerable to dictionary attacks, and does not support key generation.
-
: Recommended for users who only intend to use Microsoft desktop clients and servers. For other users, it is not recommended.
-
: EAP-MSCHAPv2 provides two-way authentication between peers by combining a peer Challenge message with the Response packet and an authenticator Response message on the Success packet.
-
: This is used to provide secure communication over the Internet between a client and server.
-
: Select not to use this feature.
-
: Select to use the installed job accounting method.
-
: Select to use the job accounting method provided by the SyncThru™ Web Admin Service (For detailed information, refer to the SyncThru™ Web Admin Service guide).
[a] This feature may not be available depending on models or option kits installed.
-